Saturday, January 31, 2009

The One

When I was planning my own wedding, I ran to the bookstore on the first of every month eager to buy all the new bridal magazines. I would pore over them for hours, looking for the perfect dress, cake, flowers, and of course, my first love, invitations. I worked as a graphic designer and I knew that I would at least make a portion of my own wedding invitation set, but I was constantly looking for ideas and inspiration. One day I came across THE ONE. You know when you see THE ONE, right? Whether it's "your" dress, "your" flower arrangement, or somewhat less significantly, "your" fiancée (kidding!), you know in your heart that something special is happening in that moment. You suck in your breath, your eyes glaze over, and suddenly life as you knew it is never the same. Okay, okay, maybe I'm being a bit dramatic about paper. I don't think so, but the argument could be made. ;)

I called the design studio that offered "my" invitation set to get a quote and when I received the email, I had to rub my eyes to make sure that there wasn't something wrong that was causing me some sort of double vision. For 100 invitations, the quote was for $4,000.00.

'Scuse me?

Clearly, I had to break up with "The One." I mourned for months.

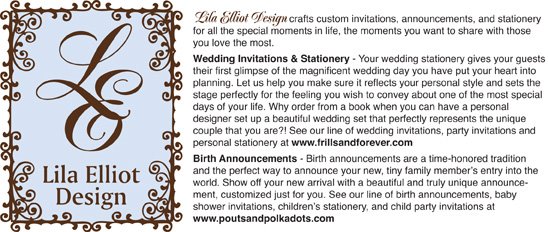
Now that I own a wedding stationery design business myself, I understand that certain elements of a wedding invitation set can be pricey depending on the details. But Bethany and I also believe that any bride, regardless of her budget CAN afford a beautiful, custom set that perfectly reflects the day that she has dreamed about. It is our business to get as creative as we can to set up something affordable AND beautiful for the bride that has a set budget for invitations. And really, how many of us don't? We get it because we've both been there ourselves. We like to tell our brides that our average set usually falls between $3 and $6 for each set (that is including the invitation, return envelope with printed return address, reception card, rsvp card, and rsvp envelope with printed address), but we also do many weddings that fall above and below that price range. Call us and we will happily work with you!

We are constantly searching for new materials that are not only beautiful, but that will save our brides money. I am always trying to come up with new designs that use less paper but that are still creative and have that "wow" factor that every bride wants. Stop into our shop and look through the new designs that combine fancy elements such as wraps, ribbons, and embellishments, using materials that are beautiful and affordable.

Give us a call! Nothing would make us happier than to introduce you to THE ONE. :)

TN

Frills & Forever Shop Pics!

Our shop! We're so excited to have such an inspiring space to create new designs and to meet our brides in!

How cute is this? Bethany's creative idea to use an old mirror to "frame" our logo. Her creativity knows no limits. ;)

A great Ebay find! White, cotton chaircovers accented with gorgeous black, satin sashes!

Samples galore!

The writing desk we knew had potential! A coat of white paint and a piece of damask fabric on the chair seat and instant elegance!

Two free file cabinets with a free painted door on top (hinges showing - how cute is that??) makes an instant mock-up station. How inspiring!

A few of our favorite samples in simple, black frames.

New Digs for our Frills and Forever Line!

It's official! We're IN. We finalized the move in to our new shop and we're open for business! We'd love for you to come visit us and check out the new invitation sets we just completed and a few new products we're really excited about, including some adorable ways to tell your guests which table they're seated at!

We're so excited about all the cool things we found to fill up our shop and we wanted to share some shopping ideas that saved us a ton of money and helped us achieve just the look we were going for!

Our first great tip is... Craig's List!! We had a really good idea of the type of furniture that we wanted, but we knew that to buy it new would be way over our budget. So.... a little online used shopping later, we were off to pick up our great finds. Craig's List can seem a little daunting which is why specific searches can make things a lot easier. Sellers usually know exactly what they're selling and will use as many descriptive words as they can. For instance, we knew we wanted a "writing desk with chair" and came across exactly what we wanted using those search terms - for $150.00 plus paint and a pretty piece of damask fabric to cover the chair seat!! Can't BEAT it! We also knew we wanted a "round, glass table" and found the perfect one that way as well - for $125 plus some beautiful white chair covers  and black satin sashes off of Ebay! And make sure to BARGAIN... not my favorite thing (I'm definitely not the wheeling and dealing type) which is why it's great that all the correspondence is done through email. Makes it that much easier try to make a deal. ;) And as an added bonus, it's GREEN! Recycling furniture is an excellent way to be environmentally conscious! We loved saving money, but we're really proud of the green aspect as well. If you're a little more uncertain about exactly what you want, use more general search terms like "desk." You'll get a lot of listings, but if you're persistent, chances are good that you'll find something that works to create your perfect space!

Another idea that we love is our "mock up center" - two low file cabinets that we got for free from a business that was re-decorating and a free door that the same business was getting rid of, placed on top of that and painted white! We love that the hinges are in front and it just has a very vintage, cool look to it!

A few great accessories picked up for bargain prices here and there (spray painted to fit the color scheme if necessary) and voila! One very inexpensive but stylish space.

Just remember, it doesn't have to be perfect to be really beautiful. Experiment, let your creativity flow and the result will be a space that really speaks of who you are! 

One word of caution, girls, bring your dad or your significant other with you - there are some great furniture finds out there, but this is the real world and there are also some "interesting" people out there as well.

TN

Saturday, January 24, 2009

Welcome to our blog!


We are so excited to be starting this blog! So many new things are happening at Lila Elliot Design and we wanted a way to keep you updated about the business, talk about the latest and greatest in stationery design, bridal trends, and new looks for baby announcements, showcase current projects, and chit chat about the things that inspire us!

The most exciting thing happening for us right now is that we are opening up a new shop for our bridal line, Frills and Forever! Beginning February 1st, we will be located at The Madison Avenue Wedding Mall in Covington, KY! We are beyond thrilled to be able to offer a storefront as a meeting location for our brides and be able to showcase our portfolio in our very own space! 

We have been busy putting our personal touch on our shop, the first one of which was painting stripes on the wall in the pinky-melon color of our logo. Lots of work but so worth the effort! They are an easy way to add that "wow!" factor to a room. In case you are up for a project like this yourself, I'd love to share some great "stripe tips" with you to make your stripes PERFECT. 

First, get a laser level! You can pick one up for under $20 these days and they are a MUST for this job... it will project a perfectly straight line for you to apply your tape to. Second, measure each wall in the room, decide how thick you want your stripes to be (ours are about 20") and then fanagle the numbers of each stripe slightly in an effort to get them to end perfectly at the corner (for instance, some stripes might be 19 7/8, others 20 1/8, etc. - the naked eye will never be able to tell). If the math doesn't work out for this, don't worry... a stripe going around a corner can look cool too! Thirdly, and this is my BEST kept stripe secret, paint along each piece of tape with the same color as the wall. This will keep your stripe color from bleeding under the tape once you paint with that, and will create a PERFECT line each time. Voila! Your friends and family will think you are a genius! :) 

We will try to update often and in the meantime, we would love for you to come check out our new wedding invitation and stationery shop in Covington! (Hourse are Wed. - Fri. 12-5, and Sat. 10-4).